
My obsession with Pinterest has meant I have seen hundreds of amazing sewing projects created by sewing half triangles from quilts, cushions, bags the list goes on. Naturally I had that moment of “well it can’t be too hard!” and although it is easy I learnt the hard way!
The first few attempts I had sewing half triangles I individually cut each triangle. Which meant it took FOREVER! Not only that but lining everything up became harder. Meaning creating a block square by square seemed an awful lot of effort in relation to the time it took, and how far I managed to get creating the entire block.

This was my first attempt which is only half of the design I was trying to achieve. I love the pattern but I stopped carrying on at this point because as you see some of the corners didn’t line up very well. So I went back to the drawing board and with a little bit of searching found a much easier way.
So here it is: How to sew half triangles (the easy way!)
Firstly cut your fabric into squares. Now the size you cut them will all depend on how large you want them for the particular project you are doing. This technique works no matter the size you choose. For this demonstration I cut my fabric into four inch squares.

Place two squares together, so that they are right sides together (or print on print). At this point I like to press the squares as it helps keep everything flat and lined up more easily.
Remember to press and NOT iron. If you run your iron over it several times instead of pressing, it will stretch the fabric.

Pin the squares together making sure everything stays lined up.
Draw a diagonal line using a ruler from one corner to the other using a fabric pen or pencil. Here I used a dressmakers pencil by Hemline in blue.

Now it’s time to sew! You need to sew using a straight stitch on both sides of the line, making sure you sew the same distance from the line.
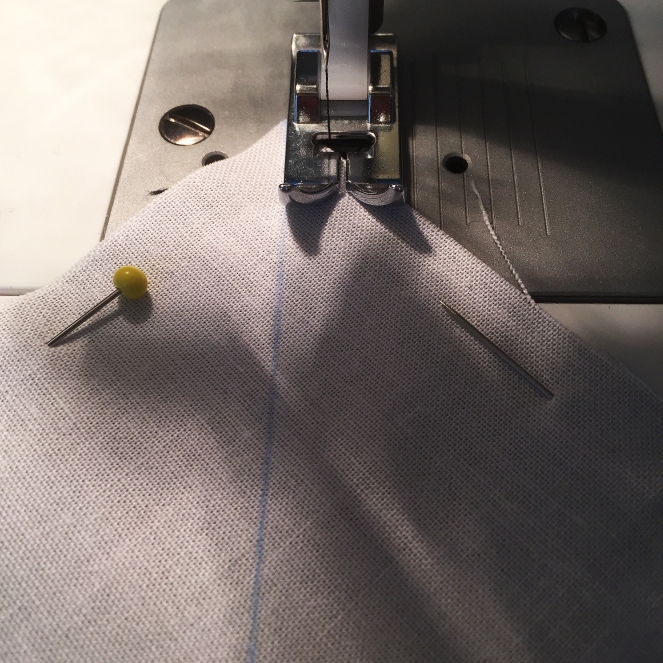
So you should end up with something like this….

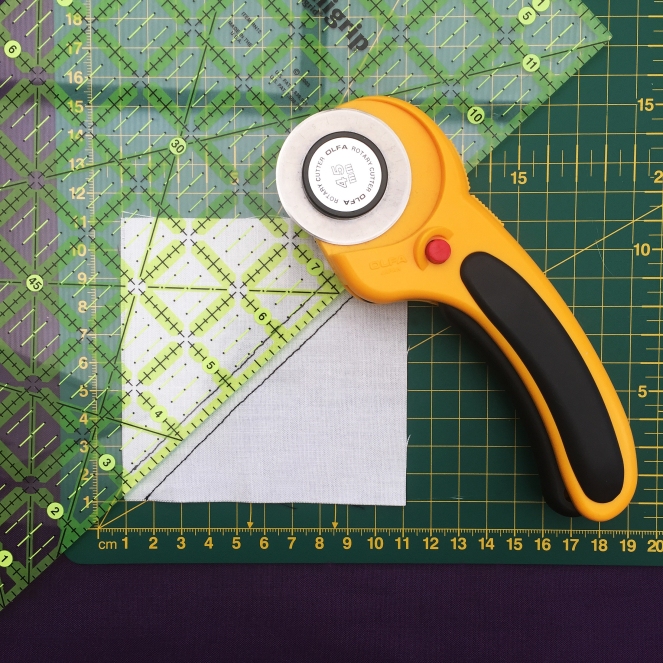
Now remove the pins and cut along the pencil or pen mark that you drew. I find using a rotary cutter and quilting ruler the easiest way to do this.

Open each piece of fabric and press the seams to one side.
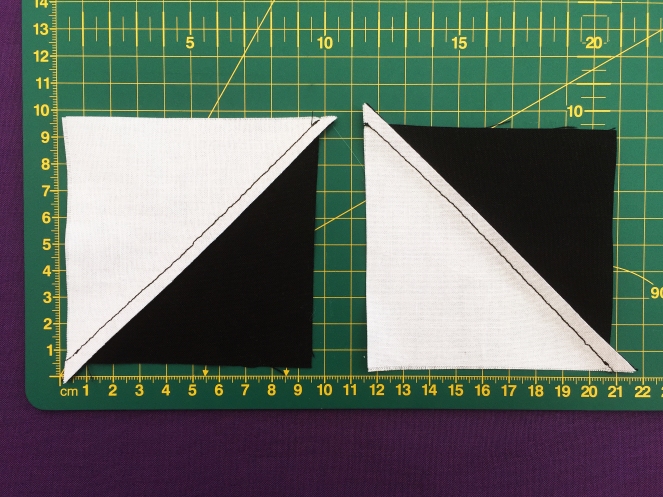
Cut the tips that over hang the square and that is it! Two squares made in one go, far easier than cutting the triangles out individually!

From using this technique you can create all sorts of patterns and designs. When you pick a design you would make all the individual squares before laying them out in your desired pattern. Once arranged sew each square together row by row. I will post very shortly the finished block that I created in more detail, showing how to sew the entire block together.
I hope you all found this little tutorial useful. I would love to hear any feedback you may have or answer any questions. If there is anything you would like to see a tutorial on please let me know in the comments below
![]()

Very good tutorial and photos!
LikeLiked by 1 person
Thank you! I’m happy to hear that it was easy to follow. My blog is in its very early stages but I have many ideas and tutorials that I plan to post. Thanks for following!
LikeLiked by 1 person